For many people, Facebook is the final resting place of their digital photos. Facebook makes it extraordinarily easy to upload, tag, and share as many photos as you wish to store there. There appear to be no storage limits, and with just a click of a button, your photos are out in the world and being liked or loved by all of your friends! In 2015, Facebook stored 900 million new photos per day!
As convenient as FB makes it to share your photos, you should know that for the site, photo storage is not…their primary objective.

The cons of letting Facebook be your sole digital storage solution are numerous, but these are the two that I run into the most (and have experienced myself!):
- The file size of your photo is greatly reduced to match their upload standards! Did you keep the original? If not, you’re left with a very small file that is not print-quality.
- Have a bunch of photos that your friends posted and tagged you in? I hope they stay on FB forever. If they deactivate their account, those photos go away!
Here are step-by-step instructions to keep your photos from falling victim to Facebook’s whims!
First, download all the photos you don’t already have copies of. Maybe some pictures that you uploaded only exist on FB now. The simplest and quickest way to do this is to download your Facebook Archive.
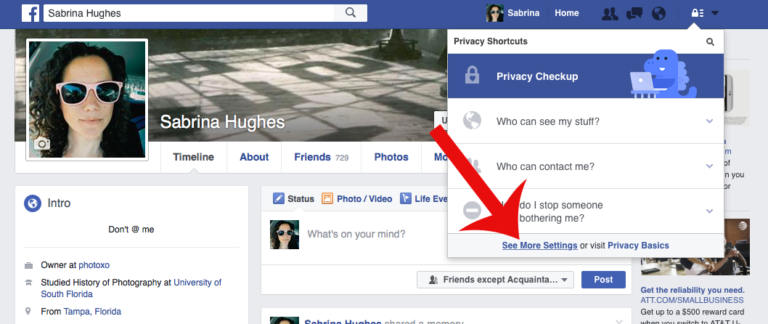
Go to Privacy Shortcuts (it’s the little lock icon with three lines next to it). Click that, then See More Settings at the bottom.
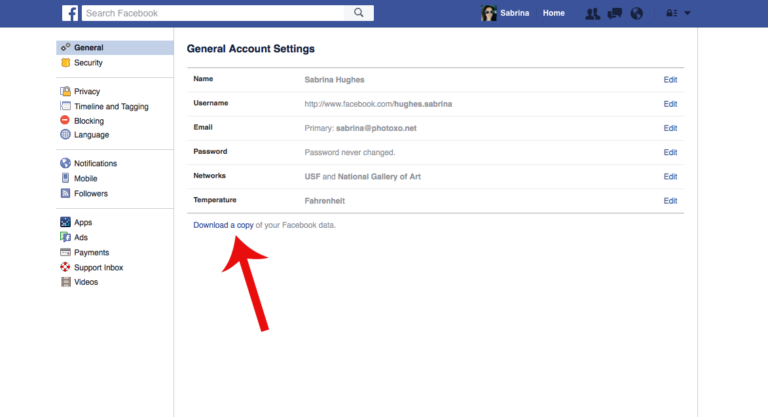
On the next screen, choose General Account Settings (top left), then look all the way at the bottom of the options for the link that says Download a copy of your Facebook data.
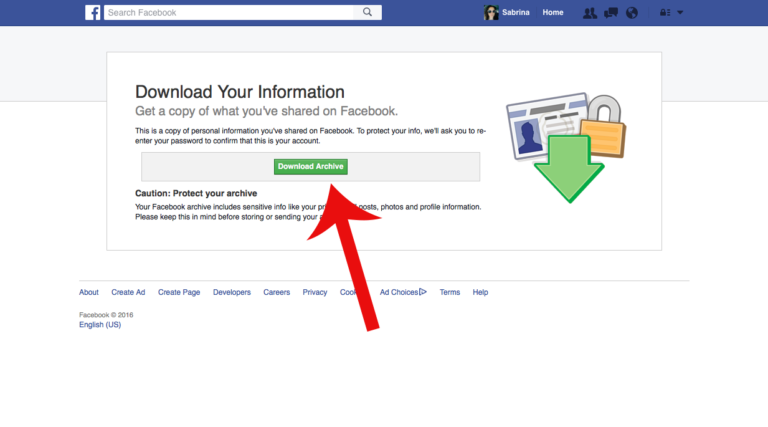
Click the green Download Archive button and enter your Facebook password. They’ll email you when it’s done and you can download all the info, including all of the photos that you have uploaded. (some of the other info they send you is pretty wild too!) If you’re an admin on a Page, you can follow the same steps from the Page to download its archive (I highly recommend doing this if you are a Page admin).
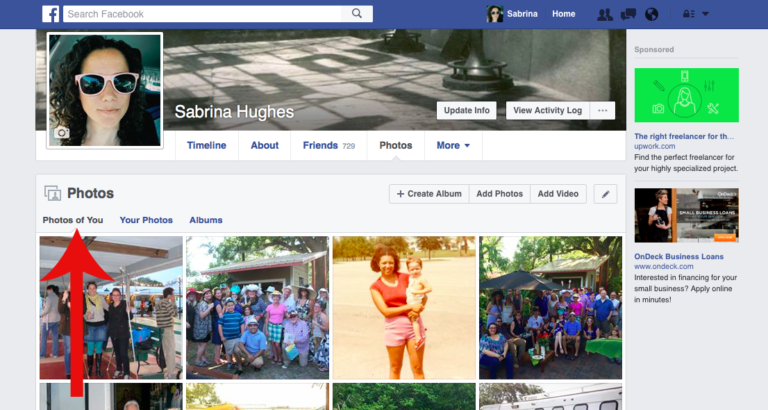
Now, we have to deal with photos of you that other people have uploaded (unfortunately, photos that you are tagged in that were uploaded by friends are not included in your Archive download).
From your profile, click Photos, then make sure you are on the tab that says Photos of You (at the time of this writing, this is the default landing page when you click photos, so you are probably already there).
Select the photo you want to download and click it to enlarge it and to make other options available.
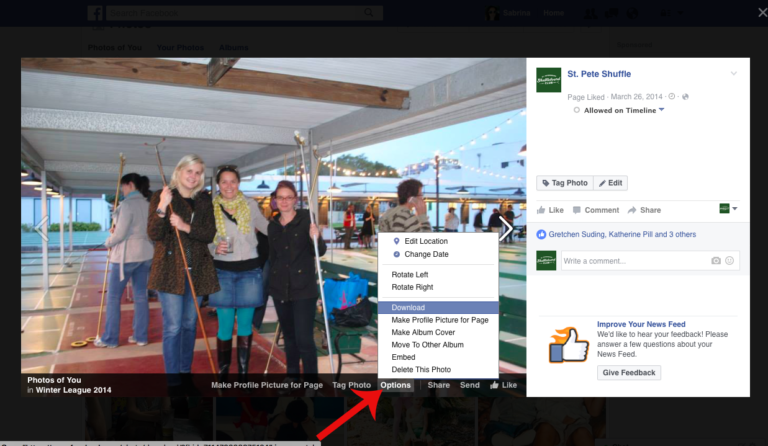
When the photo opens full screen, look down at the bottom for the Options link, click it, then click Download. This will save the photo to your Downloads folder. Now you can rename it and move it to your photos folder! This step will have to be completed one-by-one for any photos that you are tagged in that you want to download.
The better news is that you can automate the process for any photos that you are tagged in going forward.
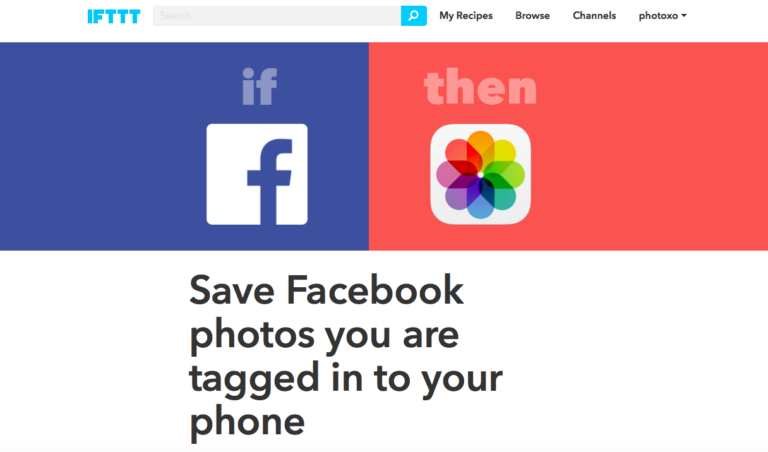
If This Then That (IFTTT) has a killer recipe to Save Facebook photos you are tagged in to your phone. So click the link, create an account, link your Facebook account to IFTTT, and your phone, and then that’s one less step you have to think about the next time your friend tags you in a great pic!
Preserving your photos isn’t Facebook’s primary objective, but it can easily be yours.

